Why Searing Still Reigns in 2026
There’s a reason chefs obsess over getting a proper sear it’s not just cosmetic. This isn’t about grill marks or Instagram likes. It’s about science, and more importantly, flavor.
When meat hits a hot pan, something called the Maillard reaction kicks in. This is a chemical process where amino acids and sugars rearrange themselves under high heat. The result? That deep, savory crust that gives steak, chicken, or even tofu their bold, complex flavor.
Think of searing as laying down the foundation of great taste. Without it, you’re leaving a lot on the table. Literally. No amount of sauce or seasoning can match what happens when a dry, well prepped piece of meat meets screaming hot metal.
It doesn’t matter if you’re working with a ribeye or a budget cut you can build massive flavor through searing. It’s one of the most consistent, transformative tools in your kitchen. And once you understand what it’s doing on a molecular level, you stop skipping steps. You start listening for the sizzle.
Choose Your Weapon: The Right Tools Matter
Start with the pan. If you’re after a serious sear with that golden brown crust, cast iron is your go to. It holds heat like a champ and recovers quickly if the meat cools it down. For thick cuts like ribeyes or pork chops, cast iron gives you that even, aggressive browning. Stainless steel, on the other hand, is great for quicker cooking proteins like chicken breast or thin steaks. It’s lighter, responsive, and gives more control if you’re juggling several things on the stove.
Avoid non stick. Always. These pans can’t handle the high heat needed for a proper sear you’ll end up steaming instead of browning. Plus, the coatings can break down under high temps. Save them for eggs.
Now for the supporting cast: a pair of sturdy metal tongs gives you control without piercing the meat (and losing juices). A good instant read thermometer removes the guesswork no need to cut into your steak to see if it’s done. Finally, use a neutral oil with a high smoke point canola, grapeseed, avocado. They can take the heat without burning or overpowering the flavor.
Searing isn’t art. It’s gear, heat, and patience. Get those three locked in, and you’re halfway there.
Start Dry: Prepping the Meat
If there’s one prep habit that separates a perfect sear from a soggy disappointment, it’s this: pat the meat dry. Moisture is the enemy of browning. Whether it’s steak, pork, or chicken, excess surface water turns your sear into a steam bath. Two seconds with a paper towel saves your crust.
Next: temperature. Cooking straight from the fridge won’t destroy your dinner, but it does mess with consistency. If the cut is thick, let it sit out for 20 30 minutes. That takes the chill off and helps it cook more evenly. Paper towel it again before it hits the pan.
Now, seasoning. Here’s the cheat code: for fattier cuts (like ribeye or pork shoulder), season before. The salt helps draw out moisture early, and that helps crisp the fat. For leaner or thinner cuts (say, a filet or boneless skinless chicken breast), consider seasoning right before it hits the heat or even after if you’re using a bold rub. That avoids drying it out.
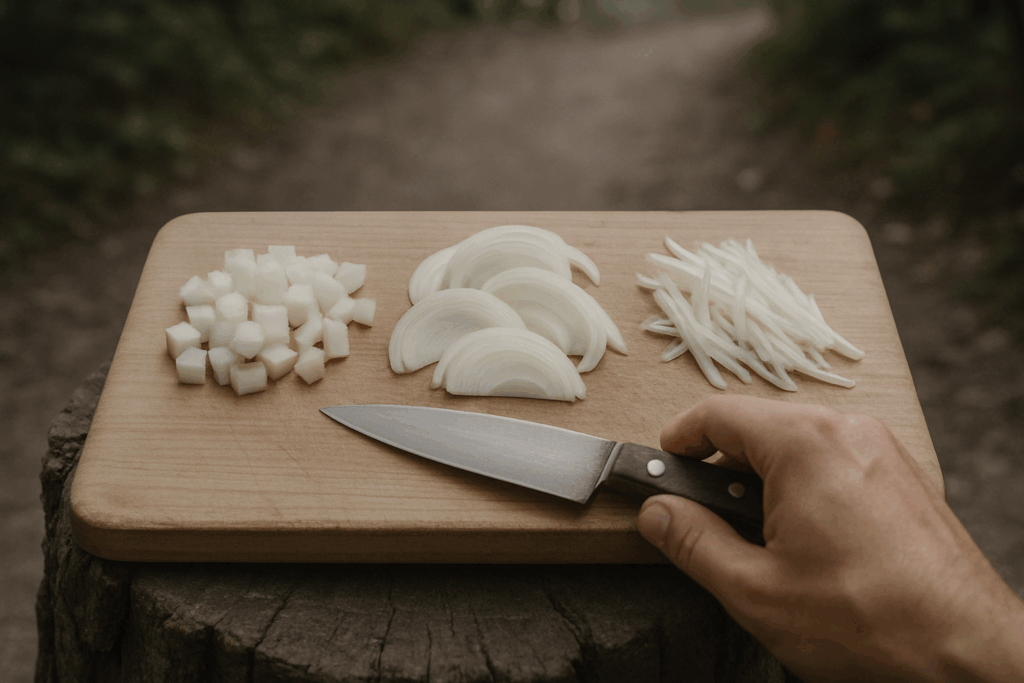
One last prep tip? Your knife skills matter more than you think. Level up your prep game with these 5 knife skills that will improve your cooking instantly.
Heat is Not Optional It’s Essential

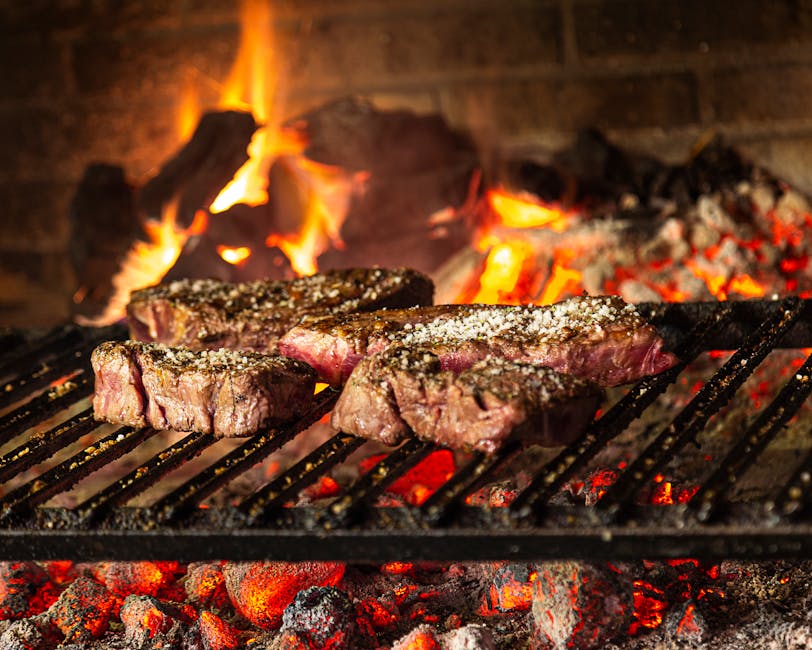
Heat makes or breaks a sear. But not all proteins want the same treatment. For beef steaks and pork chops, you want your pan hot borderline screaming. Think just shy of smoking, around 400 450°F. Chicken prefers a notch below that medium high gives you crisp skin without torching the fat. Fish is even more sensitive; medium to medium high is plenty, especially for delicate cuts like salmon or cod. Anything hotter and you’re just burning protein and wasting flavor.
To test your pan’s readiness without wrecking dinner, skip the sizzle test with meat. Instead, flick a few drops of water into the pan. If they bounce and vanish, like little mercury balls, you’re in the zone. If they hiss and linger, it’s not hot enough. If they explode on contact, your pan is too hot and your oil’s probably already toast.
Speaking of oil it should shimmer, not smoke. A shimmering surface means it’s ready. Smoking means you’re seconds from a bitter burn and possibly setting off your smoke alarm. If it does start to smoke, pull the pan off the heat and wait 30 60 seconds. No harm in regrouping. It’s better than starting over with a scorched base coat.
Heat smart. Sear once. Get it right the first time.
Let it Ride: No Touching
Here’s the biggest rookie move when searing meat: you put it down, hear that initial sizzle and then panic. You poke it, prod it, maybe even flip it too early. Stop. Walk away. Let the meat do its thing.
The sear only develops when the protein stays in direct, uninterrupted contact with the hot surface. If you move it too soon, the crust never forms. You lose flavor, and the meat ends up looking and tasting flat.
So how do you know it’s ready? Use your senses. You’ll hear a clean, even sizzle start to quiet down that’s the water cooking off. After a couple of minutes, give the pan a slight shake. If the meat moves easily, it’s probably seared. If it sticks, it’s not ready. Smells will change too once it’s nutty, rich, and toasty, you’re getting close.
And when it is time to flip? Do it once. One clean turn. Flipping back and forth interrupts the heat path and kills the crust. One side should be deeply browned before you even think about the other.
Patience isn’t extra credit here it’s the meat of the technique.
Finish Like a Pro
Searing doesn’t stop when the crust forms. The best cooks know the final steps are where the magic really happens. From butter basting to resting, mastering these finishing techniques is what separates a good piece of meat from a great one.
Butter Basting: Add Flavor While You Finish
Butter basting is more than a showy chef move it brings richness and flavor depth that’s hard to beat.
When to Butter Baste:
After the initial sear, once a golden brown crust has formed on one side
When the pan is hot but not smoking add butter along with aromatics like garlic, rosemary, or thyme
How to Do It:
Tilt the pan slightly to pool the butter
Use a spoon to continuously scoop and pour the melted butter over the top of the meat
Baste for 1 3 minutes, depending on thickness and desired doneness
This method enhances browning and infuses flavor directly into the meat’s surface.
Resting: Not Optional, Completely Essential
Resisting the urge to cut immediately is one of the hardest but most vital steps.
Why Resting Works:
Allows juices to redistribute throughout the meat
Prevents dry slices and flavor loss
Results in a more even texture and temperature
Best Practices:
Tent with foil and let rest for at least 5 minutes (up to 15 for thicker cuts)
Resting time should be proportional to the meat’s thickness
Advanced Move: Oven Finishing for Thick Cuts
Thicker cuts like ribeyes, chops, and filets benefit from a combo sear + oven approach.
Why Use the Oven:
Searing only gives surface browning it can’t fully cook thick cuts evenly
Oven heat finishes the inside gently, preventing overcooking the exterior
How to Do It:
Preheat the oven to 375 425°F
After searing both sides, transfer the pan to the oven
Use a meat thermometer to monitor doneness (pull at target temperature, then rest)
This method ensures crusty exteriors and tender, juicy centers professional quality results right at home.
Sear Smarter to Cook Better
Searing isn’t just a technique it’s a game changer. Once you’ve mastered the fundamentals, everything you cook gains depth, complexity, and that irresistible crust we all crave.
Why Searing Changes the Game
The Maillard reaction turns simple proteins into crave worthy meals when done properly. It’s the kind of foundational skill that elevates every dish, whether you’re cooking a weeknight dinner or impressing guests.
Enhances flavor and texture instantly
Gives meals a restaurant quality edge
Creates the perfect base for pan sauces and glazes
Not Just for Beef
Searing works its magic on a wide range of proteins:
Beef: From steaks to ground beef patties, searing locks in juices and adds rich flavor.
Pork: Chops and tenderloins benefit immensely from a good crust.
Chicken: Bone in or boneless, you’ll get golden skin and juicy interiors.
Tofu: When pressed and seared properly, tofu develops crisp edges and a meat like texture.
Join the Ranks of Confident Cooks
Every great home cook has learned how to coax flavor from a hot pan. The confidence that comes with a perfect sear is unmistakable.
You’ll stop guessing and start knowing when your food is ready
You’ll understand the science behind the sizzle
You’ll elevate every meal from now on without needing complex techniques
Mastering the sear is mastering flavor. And now, you’re ready.